
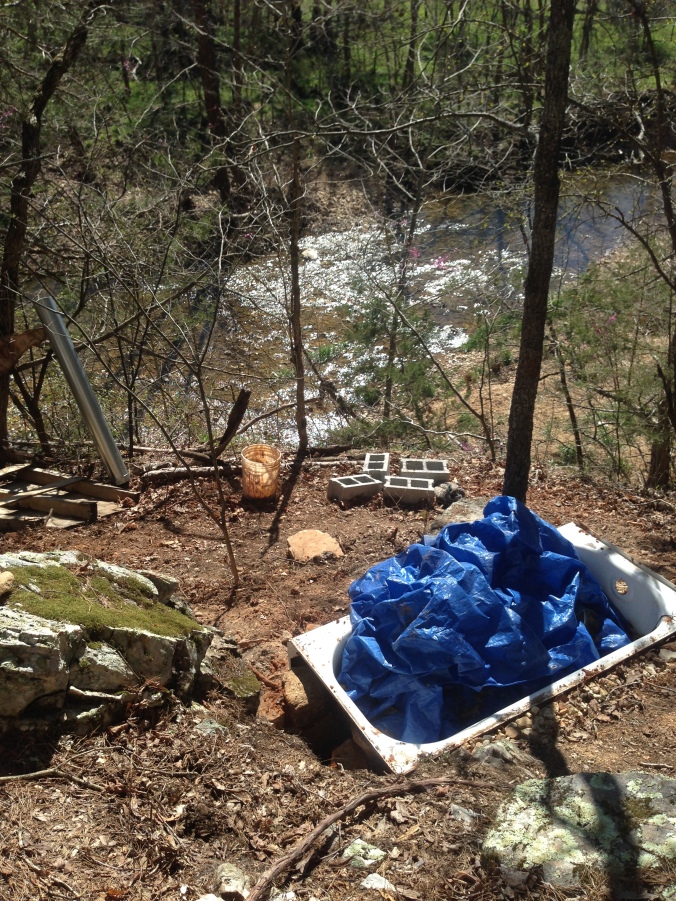
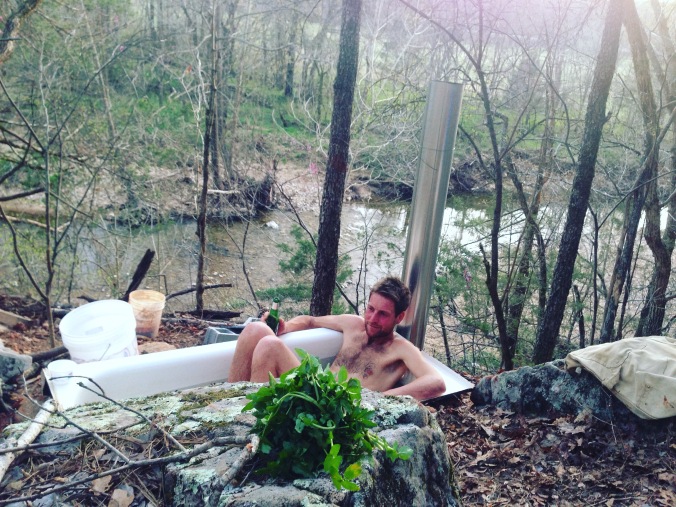
 Living off the grid is challenging and having a tub to soak in is paramount to health. We have a perennial spring that moves pretty fast so I wanted to utilize it for water. It’s at the base of our property near the creek, which is about a 10 min walk from the woods where we tucked the yurt. I relished the possibility of having a place I could take a bath and relax, and a tub close to the spring, so close in fact that one can not only see the creek but also revitalize in the sound of its rapidly moving water. So we set out to do just that.
Looking online, there weren’t any detailed plans, so we had to make our own. We found a free steel tub one day as we were hunting for treasure at the Habitat for Humanity Restore (of course a cast iron claw foot or any large metal tank would work too). That set the pace for the entire project, which so far we have only spent $7 on (for the caulk and the drain and plug for the tub as ours was missing one).
First we chose the site. As I said, I wanted it close to the water for the ease of getting water to the tub and also for the added benefit of the sweet environment water habitats provide. I chose a spot nestled between two rocks, proving that one can do this project just about anywhere. Flat ground may be easier, but because I bermed one side that saved me some cob fill. When choosing a site, think about how you’ll get water to it and the amount of flow around the tub (preferably not in a busy social area, so you can an soak up the peace and quiet while there).
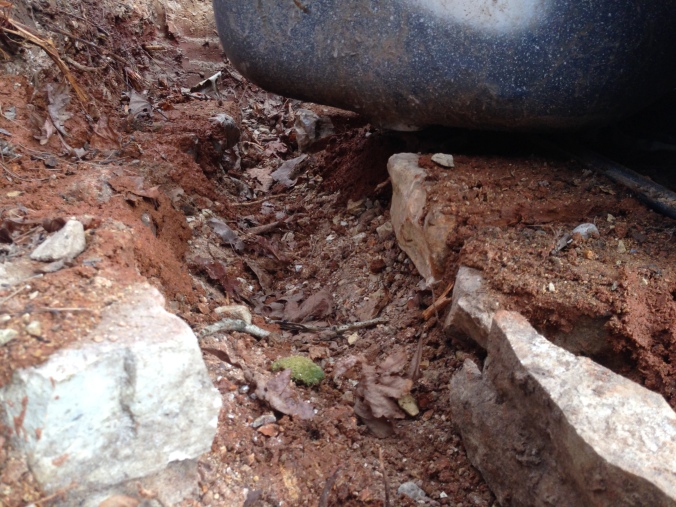
Next I dug out of the side of the sloping earth to make a level site and dug about a foot beneath the surface of the ground. I did this so I could assure a level spot for the tub’s 4 corners. And because I planned on setting stones under the four corners and pouring gravel amidst that as a type of foundation, I wanted it low enough to just reach level after I set the tub.
Once the site was excavated, I found a host of similarly sized foundation stones and put them in the four corners of the excavation site. I filled in the spots between the stones forming a parallel channel. Of course, you want to have a channel for the fire’s heat to flow under the tub, so leave ample space (I left about a 6 in wide gap, also about 6 in high). Then I filled the space between the earth and the stones with gravel and cemented it in with a cob mixture (mix 2 part sand, one part clay, and depending on how wet your clay is, add water to make a stiff dough consistency) (also, there are many other sites you can research cob and how to find out more about making a good mix so I won’t go into that here. If, in the end, your cob doesn’t turn out right: fear not, add water and make it again. This is such a fun building project because its harkens back to your childhood days of playing with mud in the woods making pies. Mmmm!).
Letting that dry, I dug out the middle channel a little deeper. Once dry, I set the tub on the cobbed stone foundation and checked for level. We decided to allow a bit of slope toward the drain, to make sure the water would drain easily. When we eventually started filling the tub, we found that we made more of a slope than we realized and thought this may be a mistake. But as we filled the tub with water, we found that the side on the up-slope (also where the fire is, so definitely not where we are sitting) not having as high of water level as the down slope was just fine because our feet were there and so it was inconsequential that the water wasn’t high. Slope is flexible.
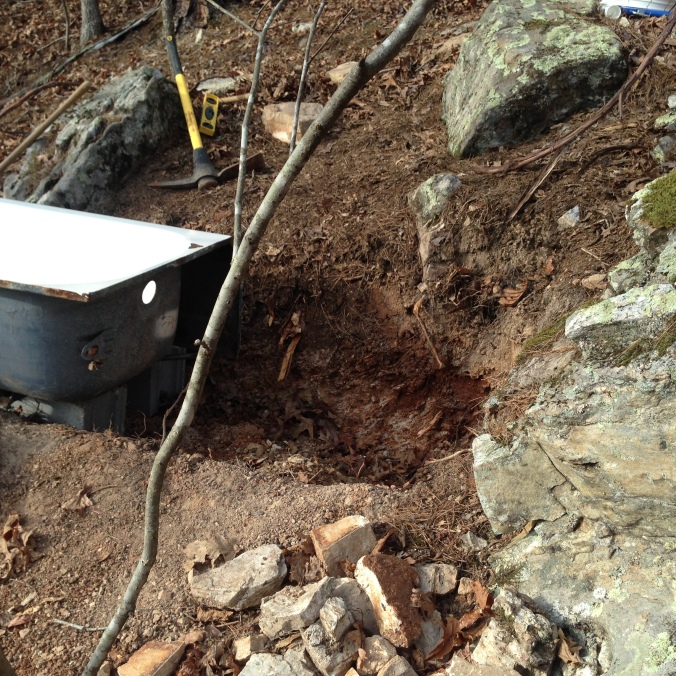
After setting the tub, I filled in the bermed side’s gaps with more cob, also using rocks as filler. Using rather large rocks, to small stones saved me from having to make more cob. The point here is to of course make a seal to trap the fire chamber that runs beneath the tub. One can also use cob to build up around the tub to provide thermal mass = keeping your tub water warmer for longer!
I filled in the other side with cob as well, and then set to placing the stove pipe. I chose to put a 6 in diameter pipe 2 ft long half under the tub, fit it with an elbow connecting with a 5 ft pipe going up. 5 ft is a good length (or even longer) to make sure you get sufficient draw from the fire. Essential for warming the underside of the tub!
I cobbed this in, again using small rocks also, to produce a good seal to close off the fire chamber. Smoke, like water, finds a place to escape if there are any gaps, making your firing less efficient! If there are any gaps, simply add more cob! Easy!
For the drain pipe, I cobbed the stove pipe near it to try to buffer any heat from blasting the rubber stopper in the drain. For now, we have a slanted rock beneath the drain, channeling water away from under the tub. Eventually we need to fit a metal pipe (able to withstand the heat) and channel the water farther away from the tub, but for now it flows into a gravel bed.
Next is the fire box. On the other side of the tub we are edged right up to a big rock so we have a vertical drop fire box (the only way ours would fit). Of course, if you have more room, you can make a firing area right beneath the tub. We used larger rocks to make the fire box and set and cemented them with cob. It worked beautifully and the fire drew beneath the tub just fine. The fire took about an hour to heat the water, at which point it almost got too hot. I’m sure we’ll get the hang of this over time. One thought is to get in the tub perhaps before it is sufficiently warm because it will certainly continue heating! 🙂 Make sure you collect enough fire wood and set it close to the tub because you’re not going to want to get out and gather part way through your bathing experience.
Also, put a piece of wood (with some small holes drilled through it, so it doesn’t float) on the bottom of the tub, as the metal will get really hot!
The main points are making sure you have a good cob mixture (again you can research this all over the Internet), having a solid foundation for the tub to rest on, making sure your end stove pipe is long enough to make sure you get a good draw, and sealing off the fire chamber with cob. The possibilities are endless as far as aesthetics (making shapes and designs in the cob surrounding the tub and adding stones, etc), placement of tub and what kind of tub, and what type of fire chamber you decide to do.
Hope this helps for anyone endeavoring to make a wood fired cob tub! Happy relaxation 🙂
